Albuera refightThe ideaConstructing the terrain Part I Part II Part III Part IV Miniatures The Battle |
Constructing the terrain - Part I
We decided to build the terrain so that it would fit on top of our larger regular gaming table and have just some room to spare. We thus settled to the size of 270 x 130 centimeters (9 x 4 foot). Since we'd still be playing other scenarios every now and then the terrain needed to be easily removable. Thus we decided to divide the terrain into 6 sections each of them being 90 x 65 centimeters (3 x 2 Ft.). The terrain also needed to be sturdy enough to withstand at least some rough handling during transportation but also it needed to be light enough to be easily handled. The light weight would also enable the terrain sections to be stackable during transportation requiring thus much less space. The base material on top of which everything else was to be build would be inexpensive hardboard. The elevation levels would be built from cardboard boxes since we could get an endless free supply of it from Fantasiapelit. Doing mock-ups of the map's steepest climbs we did some trials with miniatures to test how thick the cardboard elevation levels (and thus how steep the hills) would be before the models would keel over. We found out that 4 millimeters would be most suited for our needs. THE CONSTRUCTION PLAN Everything of course went as planned so you can skip our actual construction notes below and just go straight to the battle report... :) |
| [Back to main] |
Next >>
Further reading |
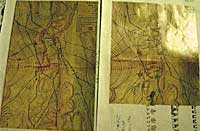
 From internet we managed to find rather splendid looking maps of the battle
which included the all important elevation levels clearly presented.
Since there was plenty of elevation levels we did a small size (A4)
miniature of the terrain to give us a clearer 3D picture of the battlefield
. With it we would be able to use if as a reference during the
construction of the actual terrain. Also it would give us advance view of
what the terrain would look like.
 We'd enlarge the map to our table size and then print it on A3 sheets which
would be taped together. From this print we would cut out each
elevation level at a time, apply cut-outs on top of cardboard, trace their
shapes and cut the cardboard to these required shapes. These cardboard
parts would then be glue on top of the hardboard base and one another with
PVA glue. After all levels were applied the edges of the step-like terrain
would be smoothed and made more naturally rounder with filler. When this
was dry sand would be applied with PVA to give texture and finally
everything would be painted. Buildings and vegetation would be removable so
during game play they could be moved from the miniatures way when needed.
Also while in storage or during transportation the space the terrain needs
is also much smaller with removable forests etc.